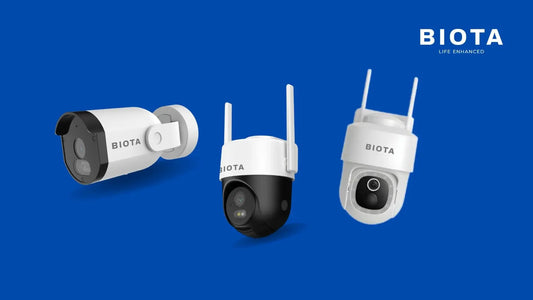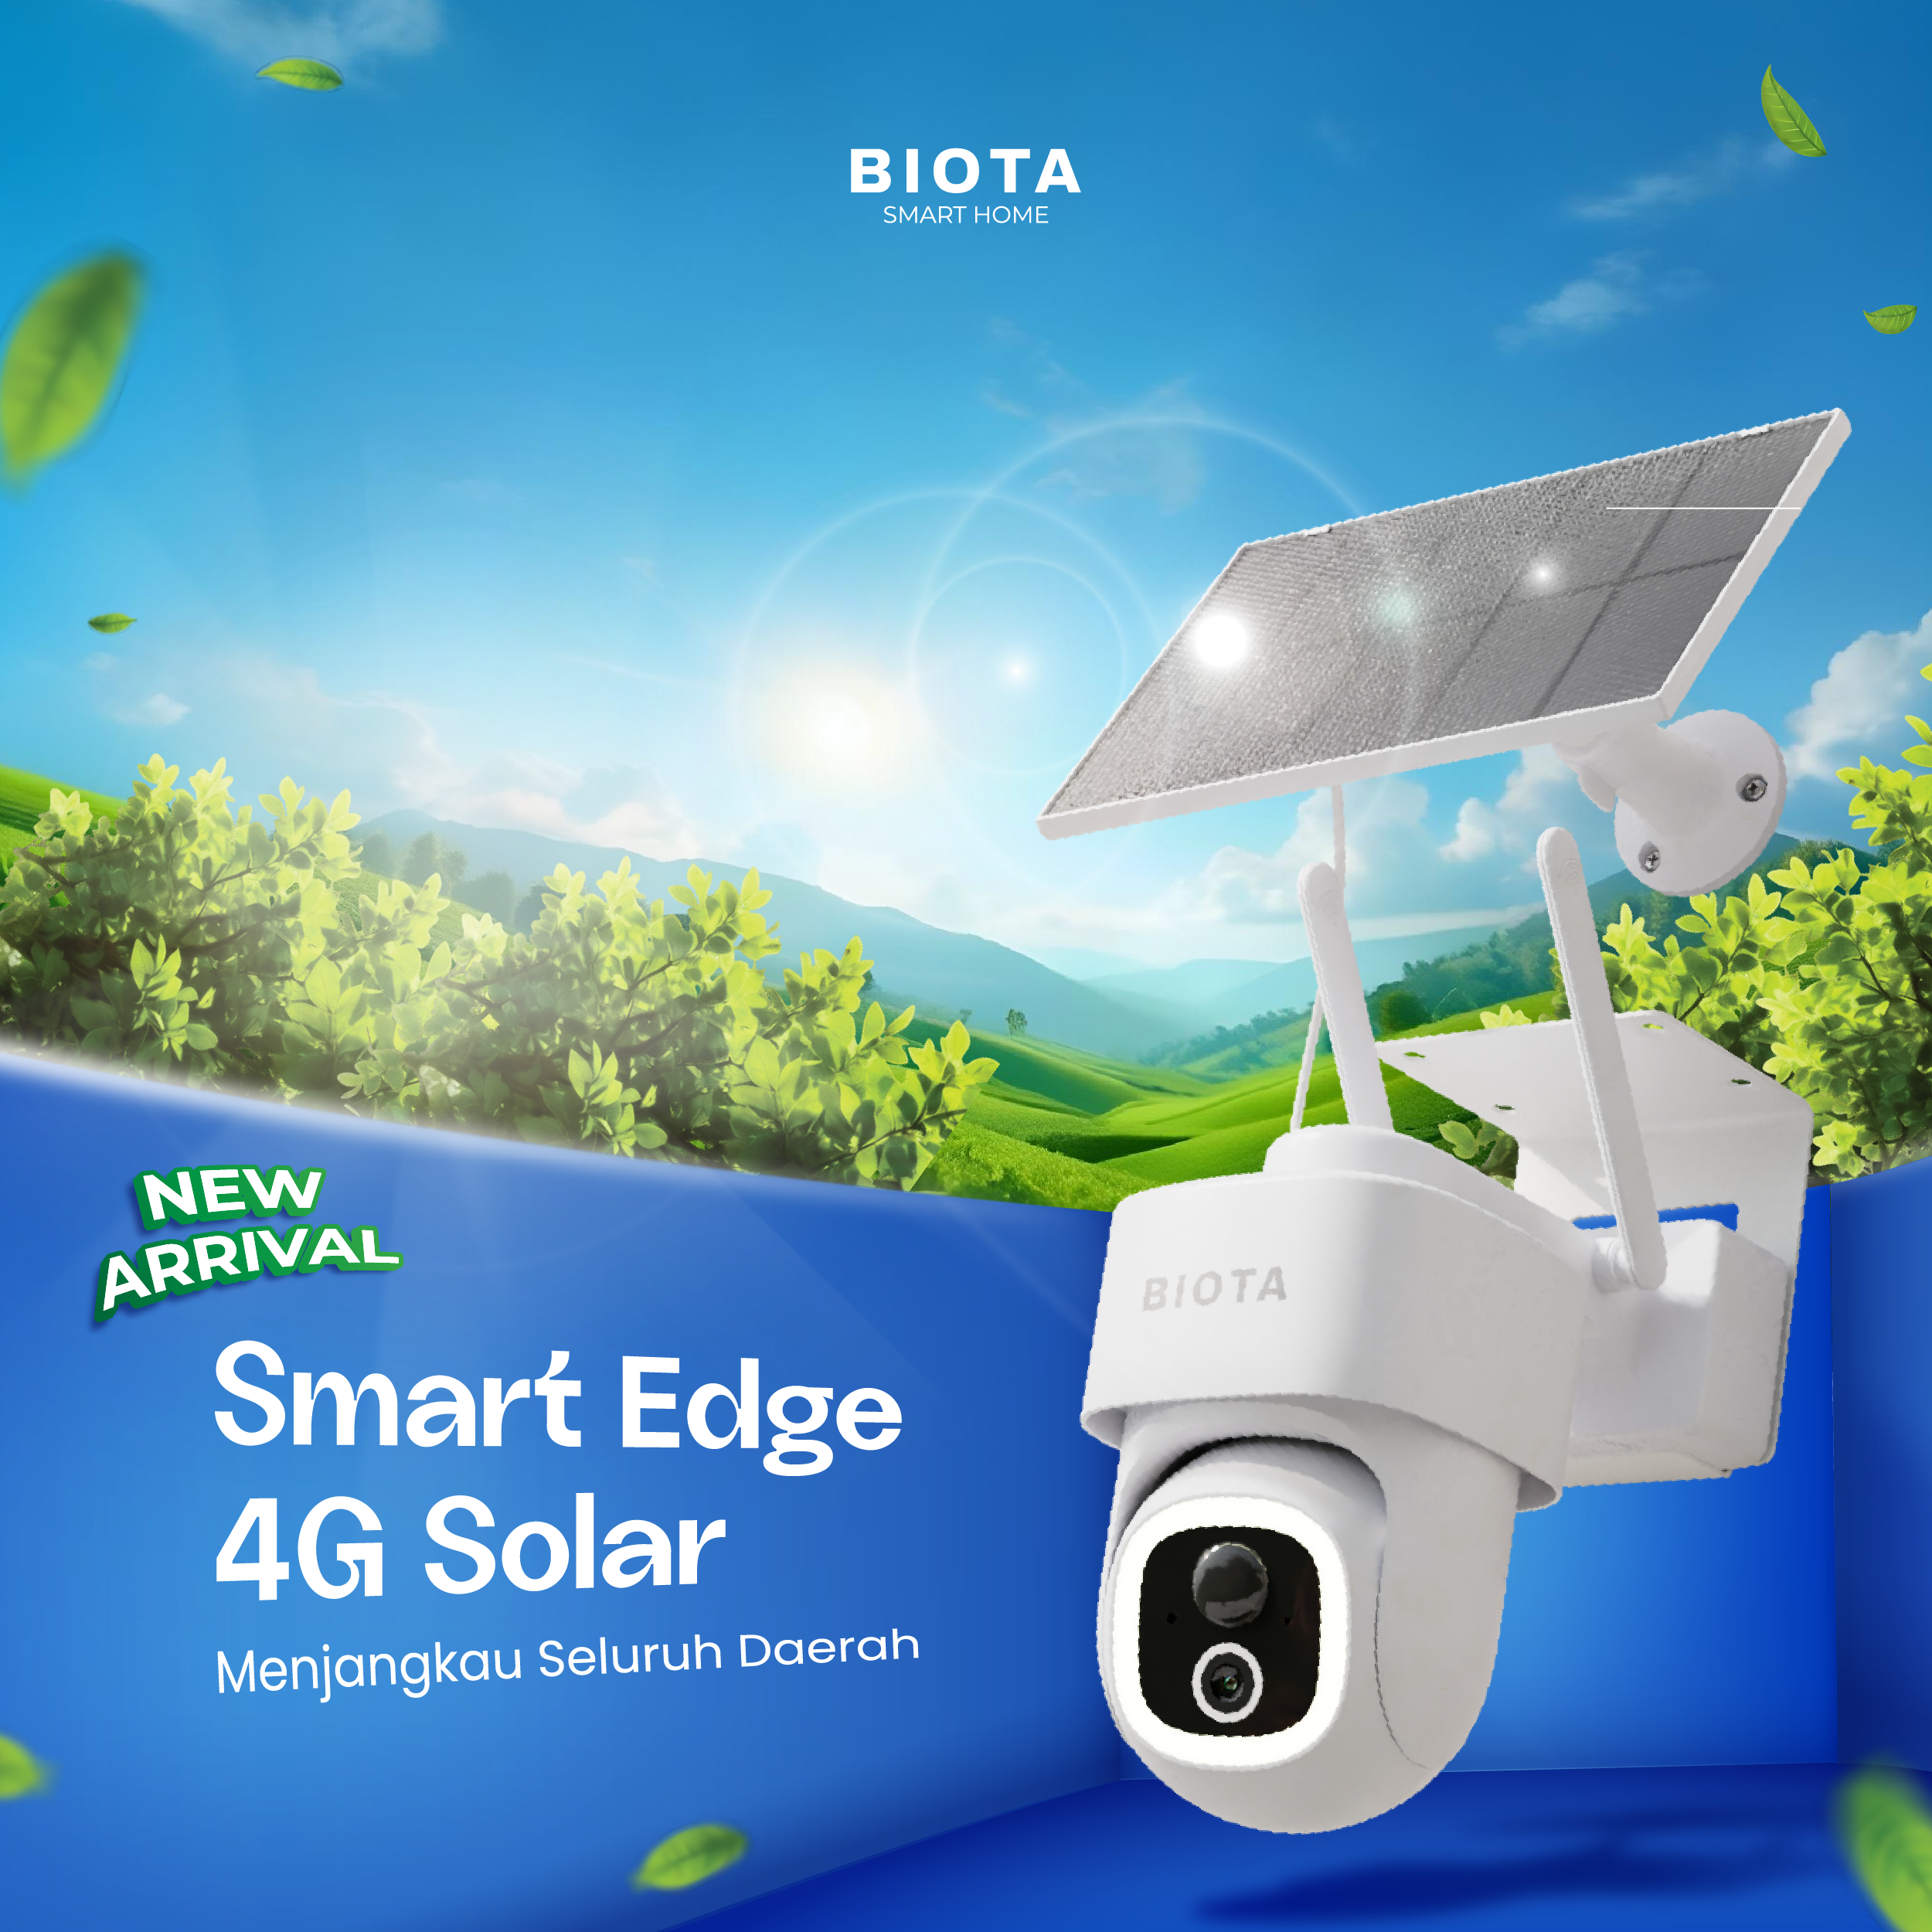

Solar-Powered CCTV: Today's Off-Grid Surveillance Solution
Securing valuable assets in locations remote from electricity and internet access, such as large plantations , fish farms , or detached warehouses , is no longer a major concern. The key to 24/7 peace of mind lies in Solar-Powered CCTV . This revolutionary camera offers total energy independence, making it the most effective off-grid surveillance solution on the market. You no longer have to worry about your assets being unattended during power outages or when you're not on site.
This camera operates autonomously: it uses solar panels as its primary power source and a 4G SIM card for internet connection ( 4G CCTV ). This means there are no electrical cables to run, and no reliance on a WiFi router .
This article will guide you step-by-step on how to properly install solar-powered CCTV , from initial preparation and physical installation to application setup . The goal is simple: ensure your security system operates optimally, reliably, and hassle-free 24/7 .
1. Initial Preparation: Ensure Your Solar-Powered CCTV Camera is Ready
Before you climb the ladder and mount the camera outside, there are some important preparatory steps you should take indoors to ensure a smooth installation.
A. Charge the Battery Fully (100%)
Even though the camera will be powered by a solar panel, it is very important to ensure the internal battery is 100% charged using a power adapter.
-
Initial Start-up Purpose: A full battery is required for the camera's initial start-up , pairing with the app, and testing all features in a controlled environment. If the camera is installed with a dead battery, it may not turn on when the solar panel is not operating at its maximum capacity.
-
Charging Time For large capacity batteries (above 10,000 mAh), the first charge may take 5-8 hours .
B. SIM Card and MicroSD Installation (4G CCTV)
Since this camera is a 4G CCTV , it requires connectivity and storage media.
-
SIM Card: Use a 4G SIM card from a carrier with the strongest signal coverage at your installation location. Make sure you have enough internet data, as the camera will use it immediately during pairing and live view .
-
MicroSD Card: Install a high-capacity (minimum 32GB or 64GB recommended) high-speed ( Class 10 or U3) MicroSD card for seamless local recording storage. Format the memory card via the smartphone app after pairing .
C. Test Connection and Key Features
Download the camera app ( Biota Home or similar) and pair the camera. Make sure you can see the live view , receive notifications, and test the main features:
-
Motion Detection Make sure the camera detects motion and sends instant notifications.
-
Night Vision Test the live view in a dark room to ensure the infrared light is functioning optimally.
-
Two-Way Audio Test microphone and speaker functionality .
2. Step 1 Selecting the Best Location for Solar Panel Performance and Signal
The effectiveness of a solar-powered CCTV system depends heavily on two factors: solar panel placement and 4G signal strength. This is key to reliable, 24/7, electricity-free surveillance .
A. Solar Panel Placement Criteria
Choose a location that ensures the solar panels get maximum power:
-
Direct Sunlight (Maximum Exposure): Panels should receive at least 5 to 6 hours of direct sunlight per day, especially during peak hours (10:00 AM to 3:00 PM). Avoid locations that could be shaded by trees, buildings, or billboards during the day.
-
Ideal Direction (Indonesia Only): For tropical regions like Indonesia, face the solar panels south or north (at the correct angle). Research shows that an ideal angle of around 15° to 30° will maximize energy capture from the sun's daily movement.
-
Safety and Height: Mount the panel at a height high enough to be out of reach of humans or animals, but still accessible for periodic cleaning.
B. Ensuring Optimal 4G Signal Strength
Remember, your camera is a 4G CCTV , signal is the lifeblood of its connectivity.
-
Signal Test: Before drilling, test the 4G signal strength at the installation point using your smartphone . If the signal is less than two bars, consider a different location. A weak signal will cause slow live viewing and delayed notifications.
-
External Antenna: If your ideal location has a less stable signal, choose a 4G CCTV model with an external antenna feature, or consider using a small 4G signal booster for that area ( Expertise solution ).

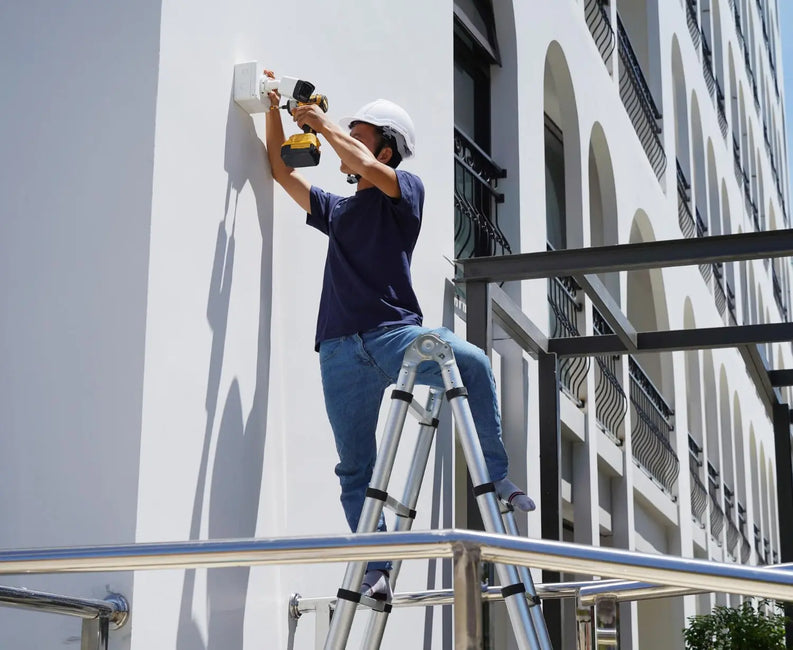
3. Step 2: Sturdy Physical Installation of the Camera and Solar Panel
Once the location is decided, it's time to begin the physical installation. Make sure you use the right tools and follow safety guidelines.
A. Installing the Camera Bracket
-
Mark the Drill Point: Hold the camera bracket at the desired location and use a pencil to mark the drilling point.
-
Drilling: Drill holes according to the markings. Insert fisher (plastic wall screws) into the holes to ensure they are securely fastened.
-
Secure the Camera: Install the bracket and tighten the screws until the camera stays in place. Ensure the camera is positioned to provide maximum viewing angles of the monitored asset (e.g., entrances, heavy equipment, or property boundaries).
B. Installing Solar Panels
-
Position the Panels Install the solar panel brackets in the designated locations (as instructed in Part 2). Ensure the panels are at the correct angle.
-
Connect the Power Cable: Connect the power cable from the solar panel to the camera's power port . It's important to ensure a tight connection and protect it from water (use a rubber cover if provided by the manufacturer). Water entering the connector can cause serious damage to the battery and camera.
-
Tidy up cables. Use cable ties or cable clips to keep excess cables from dangling. Tidying up cables reduces the risk of damage and creates a more aesthetically pleasing appearance.
4. Step 3: Optimize Routine Monitoring and Maintenance
Physical installation is just the beginning. To ensure your solar-powered CCTV system performs with high levels of expertise and trustworthiness , you need to perform regular optimization.
A. Intelligent Motion Detection (AI) Calibration
Once the camera is installed, false alarms are often a problem.
-
Reduce False Alarms : Enable Human Detection or Vehicle Detection through the app . This prevents notifications from moving tree branches or small animals, focusing only on real threats (research shows that AI detection can reduce notifications by up to 90% compared to traditional motion detection).
-
Set Area ( Motion Zone ): Set the specific area that is most important to monitor (for example, only the area near the entrance gate), and ignore irrelevant areas (for example, a highway in the distance).
B. Solar Panel Maintenance
Although Solar CCTV is almost Electricity Free , solar panels do require attention.
-
Regular Cleaning: Dust, dirt, or cobwebs can reduce solar panel efficiency by up to 20-30% . It's recommended to clean the panels with a soft cloth and clean water every 2-4 weeks to maintain maximum power absorption.
-
Battery Check Check the battery level regularly through the app to ensure the solar panels are working optimally, especially after prolonged periods of cloudy weather.
C. Night Vision Testing
Check the camera in complete darkness. Make sure the night vision (infrared) footage is clear and the view isn't obstructed by cobwebs forming on the lens (a common problem with outdoor cameras ).
The Key to Self-Safety Is in Your Hands
Installing solar-powered CCTV is a long-term investment in independent security. By following this guide—from battery charging and proper panel angles to 4G signal optimization—you'll ensure your assets are monitored by the most efficient system. Properly installed solar- powered CCTV , like the BIOTA Smart Camera 4G , can operate without manual intervention for months, providing invaluable peace of mind. Secure your property, increase efficiency, and start off-grid monitoring today.
FAQ Frequently Asked Questions About Solar Powered CCTV
1. How long does it take for the solar panel to fully charge the CCTV battery?
A: If the battery is empty, it takes about 1-3 days in full sunlight to fully charge a large capacity battery. However, under normal usage conditions, the solar panel will keep the battery level high every day.
2. Does the solar powered CCTV still work when it rains or at night?
A: Yes. During rain or at night, the camera draws power from the internal battery, which is already fully charged by the solar panel. A good camera can survive for days without sunlight.
3. What waterproof rating should I look for in a Solar CCTV?
A: Look for a camera with an IP66 rating or higher. This rating ensures the camera is resistant to heavy dust and strong water jets (heavy rain), making it safe for long-term outdoor use.
4. Do I have to clean the solar panels regularly?
A: Yes. Dust, dirt, or cobwebs can reduce solar panel efficiency by up to 20-30%. It's recommended to clean the panels with a soft cloth and clean water every 2-4 weeks to maintain maximum power absorption.